Removal and installation of auxiliary instrument panel body assembly
Remove
-
Remove the front left shield assembly of auxiliary instrument panel. Refer to Removal and installation of front left shield assembly of auxiliary instrument panel
-
Remove the front right shield assembly of auxiliary instrument panel. Refer to Removal and installation of front right shield assembly of auxiliary instrument panel
-
Remove the microphone base. Refer to Removal and installation of microphone base
-
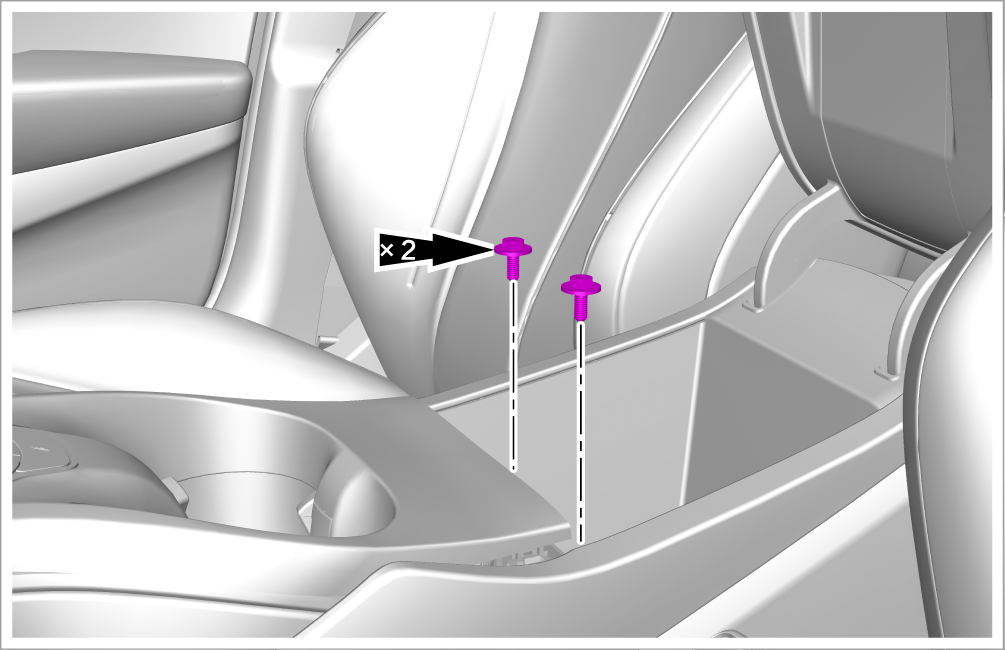
Remove 2 fixing bolts from the auxiliary instrument panel body assembly.
-
Tightening torque: 5 N•m
-
-
Remove the gearshift control mechanism panel assembly. Refer to Removal and installation of gearshift control mechanism panel assembly
-
Remove the footwell light. Refer to Removal and installation of footwell light (on lower left sound insulation board assembly of instrument panel)
-
Remove the rear trim panel assembly of auxiliary instrument panel. Refer to Removal and installation of rear trim panel assembly of auxiliary instrument panel
-
Remove the rear A/C face level air duct. Refer to Removal and installation of rear A/C face level air duct assembly
-
Remove the backup power supply. Refer to Removal and installation of backup power supply
-
Remove the USB interface assembly. Refer to Removal and installation of USB interface assembly
-
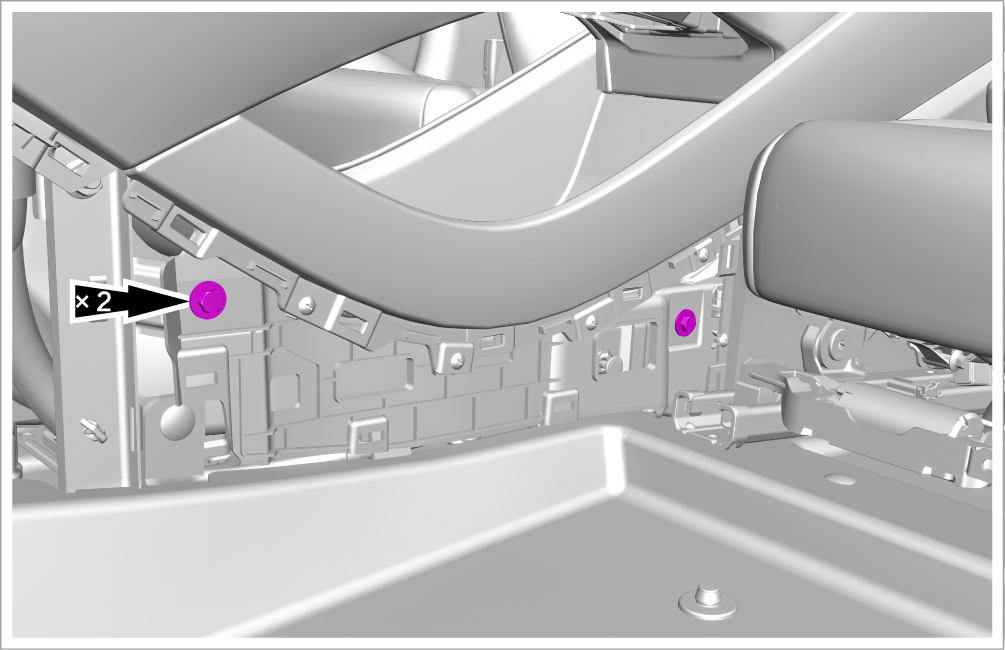
Remove 2 fixing bolts on the left side of auxiliary instrument panel body assembly.
-
Tightening torque: 5 N•m
-
-
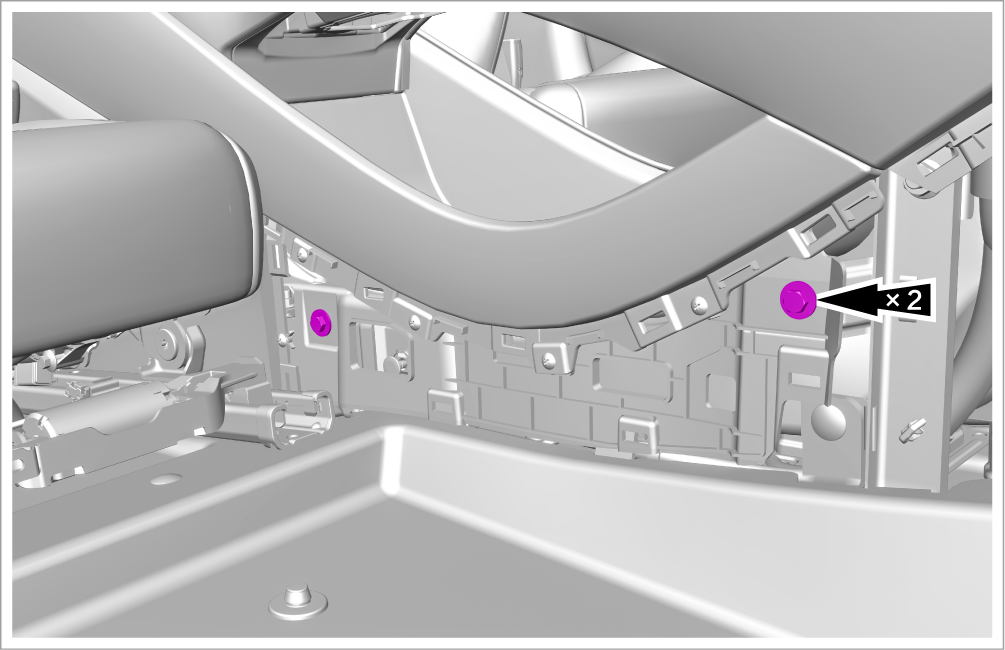
Remove 2 fixing bolts on the right side of auxiliary instrument panel body assembly.
-
Tightening torque: 5 N•m
-
-
Remove the auxiliary instrument panel body assembly.
-
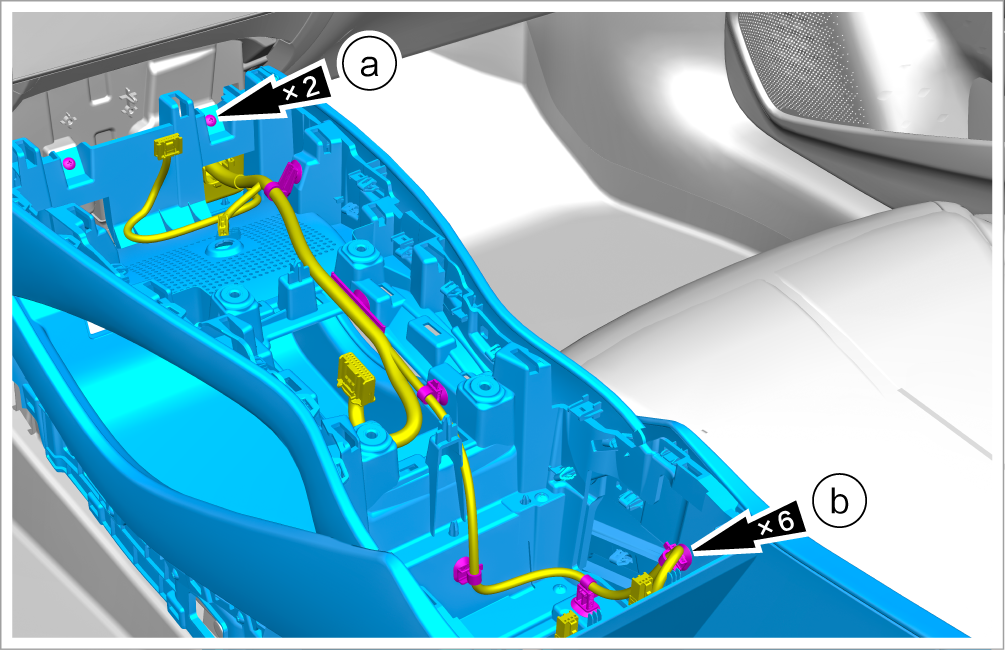
Remove 2 fixing screws.
-
Detach 6 wiring harness clips and take out the auxiliary instrument panel body assembly.
Caution
-
Take out the auxiliary instrument panel body assembly with the assistance of another maintenance technician.
-
When taking out the auxiliary instrument panel body assembly, take care to avoid scratching the interior trim panel.
-
Install
-
Install it in the reverse order of removal.