Removal and installation of glove box mounting base assembly
Remove

-
Power off the low-voltage electrical system. Refer to Power-off and power-on of low-voltage electrical system
-
Remove the glove box assembly. Refer to Removal and installation of glove box assembly
-
Remove the shutter switch. Refer to Removal and installation of shutter switch
-
Remove the left shield assembly of instrument panel. Refer to Removal and installation of left shield assembly of instrument panel
-
Remove the left skin trim panel assembly of instrument panel. Refer to Removal and installation of left skin trim panel assembly of instrument panel
-
Remove the left A-pillar lower shield assembly. Refer to Removal and installation of left A-pillar lower shield assembly
-
Remove the lower left sound insulation board assembly of instrument panel. Refer to Removal and installation of lower left sound insulation board assembly of instrument panel
-
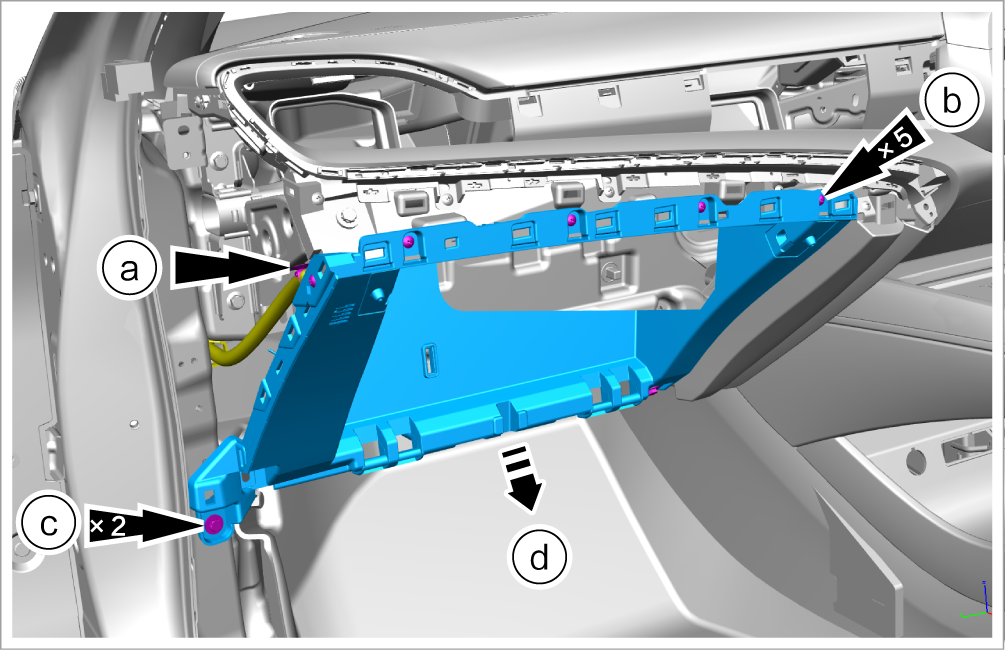
Remove the glove box mounting base assembly.
-
Detach 1 wiring harness fixing clip, and disconnect the PM2.5 rapid detector assembly from the glove box mounting base assembly.
-
Remove 5 fixing screws.
-
Remove 2 fixing bolts.
-
Take out the glove box mounting base assembly.
-
Install
-
Install it in the reverse order of removal.