Removal and installation of PAD display screen assembly
Removal 3D animation demonstration
-
Power off the low-voltage electrical system. Refer to Power-off and power-on of low-voltage electrical system Power-off and power-on of low-voltage electrical system
-
Remove the PAD access panel assembly. Refer to Removal and installation of PAD access panel assembly Removal and installation of PAD display screen assembly
-
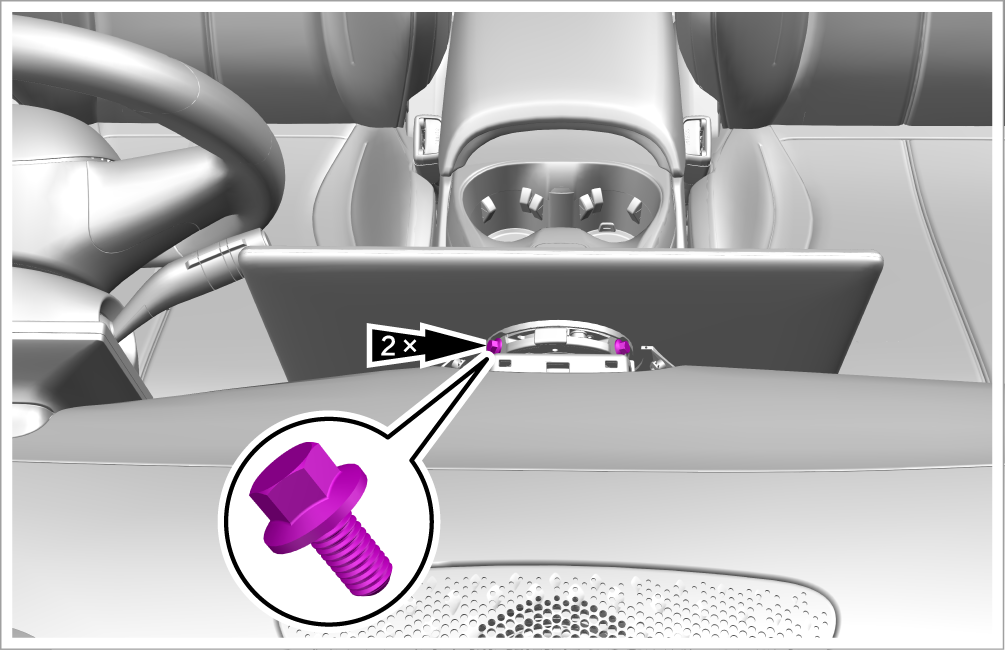
Remove 2 fixing bolts of PAD display screen assembly.
-
Tightening torque: 4 N•m
-
-
Rotate the PAD display screen assembly and detach it from the display screen bracket assembly.
Caution Avoid applying excessive force to prevent damage to connectors.
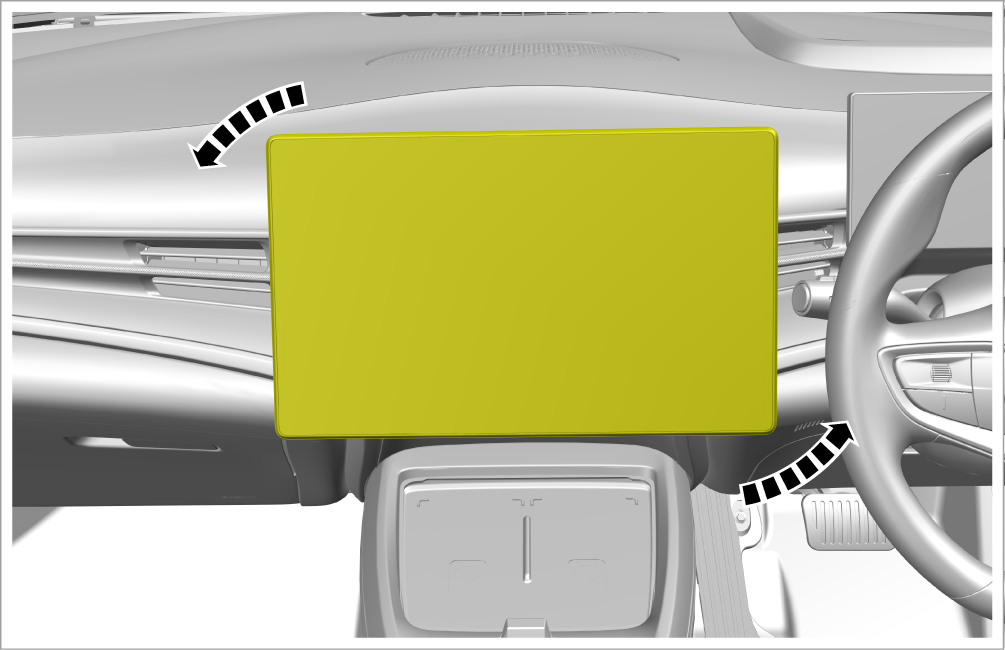
-
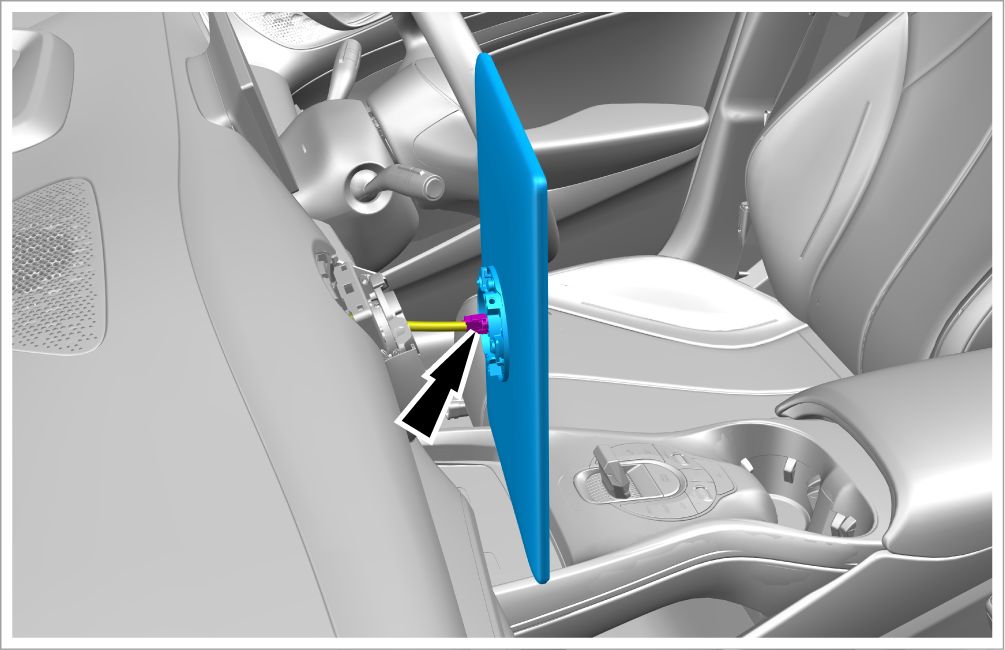
Disconnect 1 connector and take out the PAD display screen assembly.
CautionAfter removal of the PAD display screen assembly, place it properly to prevent heavy objects from squeezing it or hard objects from hitting and scratching the screen.
Installation
-
Install it in the reverse order of removal.